After finishing the jumps video and combinign it with the rembrant and moving shapes videos.
We added Bars and Tones and Universal Counter, through new items, at the start of the video (around 10 seconds each and the video on the layerabove overlapping slightly with a cross dissolve)
At the end we used captions and graphics to add rolling credits, the university logo and copyright 2022.
We also animated some text, so that it would come into frame and then move to make a word. I made 'The End' at the end of the video as well as 'jump' which I made to look like it jumps with the video. We also tried using the basic 3D effect to make text/ some of the text move in a 3D way.
//Add Video here//
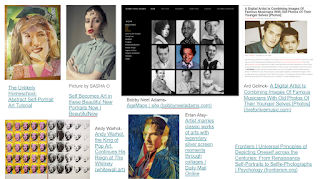
We also had a think about the self portrait project which will be due at the end of the semester.
I made a small moodboard of ideas of the sort of ideas I could maybe include in the video.
I think I will need to think more about how I would incorporate these ideas. But I do like the idea of overlaying and duplicating images of myself for the video to make it a bit more interesting than just images of myself morphing. I will also have to take into consideration that this project is going to be projected onto 3 screens, so I will have to think about how I will use that space.
I also had a tutorial where we looked at
William Burroughs cut ups
and Marina Abramović artworks:
These made me think about prehaps using words and props within the video. For instance I could include images of birthday cards which I have recieved, which would tie into the idea of the video showing the change of time.
We also looked at some videos:
https://www.youtube.com/watch?v=Yx6s-YReOJY Busby Berkely-Lullaby of Broadway
https://www.youtube.com/watch?v=0mK46KprASM Metropolis (opening scenes) with score by Zack Kline
https://youtu.be/EUO34CiTA4o Moon River - Breakfast at Tiffanys
In the next lesson we looked at how we could use colour effects like colour replace and adjustment layers.
//Video here
In my video I overlapped adjustment layers with different effects.
Adjustment layers can be used to add effects to one or multiple clips without just adding effects to the video.
'Adjustment layers are a great way of adding effects and color grading to large parts of your sequence. They can be found on your Project browser and added to the sequence in the same way any other clip or media would. Since the adjustment layer is a clip on its own, it can be moved, cut, turned off, or removed altogether in just a few clicks. If you have added an effect that you don’t like, you only need to delete it from the adjustment layer.
Adjustment layers are incredibly versatile and allow an editor more time to be creative. Using one can affect many clips underneath or across an entire edit. Once you understand how to use them, you can quickly try things out without worrying about undoing it all later.' (MotionArray, 2021)
The effects we tried included:
'Change Color effect' which 'adjusts the hue, lightness, and saturation of a range of colors. This effects all the colours in the video, I think I used this in the music video project to change some of the colours into something else, which resulted in a sort of psychedelic effect.
'Change To 'Color effect changes a color you select in an image to another color using hue, lightness, and saturation (HLS) values, leaving other colors unaffected.' Which can be useful for editing a single colour.
Colour Balance (RGB) Which changes the amount of Red Green and Blue in the video.
Gamma Correction- Changes the brightness of midtones to lighten/darken an image.
Channel Mixer - Modifies colours using a mixture of colour channels.
Echo- Creates an 'echo' of the video.
Looking back at these effects could be helpful if I ever have a particular effect in mind. I think the most useful ones would probably be Change Colour and Change to Colour.
The lesson after this we did some colour grading. We were given some clips of a steam train and of some dyes in water. Our first task was to colour grade the train video where the image was too bright (over exposed?) We also used an ultra key to key out the sky and replace it with another clip of sky.
After this we tried colour grading the water clips and editing them together using keys. I layered 3 of the videos over eachother. We then added the greenscreen video from last semester and colourgraded the people. We also added a linear wipe effect to split the video in two, to show the changes of the colourgrading. I also added a similar effect to the background.
I found the colourgrading a bit fiddly since there isn't really an exact right or wrong. I also had some troubles with keying the sky in the steamtrain video since the colourpicker wasn't picking up the right colour and also once keyed it didn't look very good.


Comments
Post a Comment