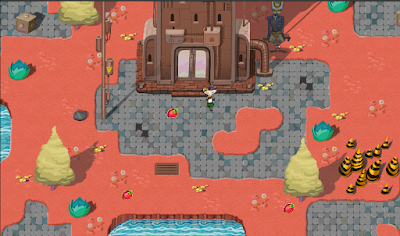
Unreal and second 360 experiment
After deciding to use unreal for my project since it has intergrated VR basics I decided to look at some tutorial videos and try some of them out.
Volumetric Cloud Secrets [Unreal Engine 4 & 5] Works in UE5! - YouTube
I watched this video first, since I want clouds in my scene, and I realised that this video was showing how to control the clouds in the sky and not how to add clouds to the scene. This could be helpful if I choose to adjust the clouds in the sky though.
I came across an error for unbuilt lighting when deleting some unnecessary objects and this video helped fix the error: https://www.youtube.com/watch?v=iPN2hWzfmP8
I also had a quick look at these videos:
Clouds in UE5 Niagara Tutorial | Download Files - YouTube - this video shares how to make mist like clouds using a smoke effect. (I couldn't really find what this tutorial was using but I found something similar)
Cloud with Niagara in unreal engine 5 - YouTube - I didn't try this tutoria yet but the method of making clouds seems very customisable.
These two videos above seem more like the sort of thing I am looking for.
https://youtu.be/nM1iabUOEPo I also found this video about how to make custom clouds which I would like to watch.
After trying some things in unreal I wanted to try exporting a short animation as a 360 video.
Animating OBJECT MOVEMENT in Unreal Engine! (Easy tutorial) - YouTube
I used this video to learn the basics of animation in unreal which are quite similar to the timeline that we learnt how to use in unity. I added a smoke effect to the scene (but couldn't figure out how to change the colour of it) and animated a simple movement.
Unreal Engine 5 360 Panoramic EASY! | No coding No Plugins - YouTube
I then used this video to export my render for 360 (I mentioned this video in my research for 360) this was much easier than the process of exporting 360 from blender but it did take a little while longer (which is expected since I was rendering more than one frame).
The process was to first check if the movie render extra render passes plugin was turned on and then to go to the sequence and using the movie clapper board looking button to open the movie render queue. Here I needed to click on the settings by clicking "unsaved config*" and then I needed to delete the deferred rendering. After removing this you can add the panoramic rendering.
Here the video creator (WINBUSH) shared the tip to tick "Allocate History per Pane" since this makes the render brighter.
A comment by @rhsoundscape adds that "This doesn't support Raytracing or auto exposure AT ALL. So if you're getting black renders, that's why." which explains the darkness without "Allocate History per Pane".To turn the renders into a 360 video you can use adobe media encoder, on my first try I imported it wrong so it turned a very short video into a 5 minute one, this was because I dragged the folder in rather than going to file and opening the first image in the sequence (which turns it into a image sequence). I also had to make sure that vr video was ticked (which it was when I did it correctly) and that maximum render quality is on, then I all I needed to do was set the output folder and start the queue.


Comments
Post a Comment