Unity: Ruby's Adventure Lesson 3
Following on with Ruby's Adventure: 2D Beginner - Unity Learn
I then updated Ruby's script so that they would have some invincibility for a short period of time when getting damaged so that the character doesn't instantly lose all their health.
After this I added the Robot Sprite and wrote out the script for it so that it moves backwards and forward. I then wondered why it wasn't moving and it was because I hadn't added the script to the bot so it was just acting like a puck from an air hockey game. 😂 I also made sure that the Robot had a RigidBody2D (Gravity 0, Freeze Z axis) and a BoxCollider2D. Once done I could change the speed to 3 and made a p[refab opf the Robot.
I then started to animate the Robot by adding an Animator Component (To the Prefab) and adding an Animator Controller to the Animations folder. I named this 'Robot' and assigned it to the Animator Conponent.
I could then go to Window>Animation>Animation Window and with the robot double clicked (To edit Prefab) I created a new Animation called 'RobotLeft.anim' I then dragged the Animation frames from the animation set we were provided (Selecting only the left animations) which added 4 key frames to the timeline. I could then test the animation however it was too quick so I needed to change the Sample Size (Which is like FPS) to 4. This meant only 4 frames would be shown in a second. Altertnatively I could have selected all the keyframes and extended them to 1 second.
I then animated the other animation frames from the set and then duplicated the left animation to make a right one. To flip the left animation I had to add a Flip X property and toggle it on the first and last frames so that the whole animation was flipped.
We then had to set up the animator by double clicking it. We needed to delete the animations in the window and replace it with a blend tree (Left click - Create State> From New Blend Tree) which would allow you to set animations depending on the characters direction. We then clicked the Blend tree, changed the Blend type to 2D Simple Directional. I then had to make the Parameters on the left hand side of the Animator Window (Float type) called 'MoveX' and 'MoveY'. Then within the blend tree I could add 4 motions and assigned them to the up, down left and right animations
(Up=X0,Y0.5__Down=X0,Y-0.5__Left=X-0.5,Y0__Right=X0.5,Y0).
I then updated the script to assign the Float Parameters and to finish adding the animations. I then added an animator to Ruby and made Ruby Animated as well using a premade Animator Controller.
We also had a look at a way we could make our own animations using a box and the red circle button to 'record' an animation. When recording we could move the box and it would update the current key frame. It is also possible to animate rotations this way using the rotation property and changing the z rotation to 360 in the second frame. We then had a go at linking animations in the animator window by rightclicking. In the settings of the link there is an option for exit times which when ticked the second animation will wait before the first is finished before playing. We can also add different types of parameters which can be used to activate an animation.
I then had a look at the next task which was to create projectiles for Ruby to throw at the robots to fix them. To do this I needed to create a projectile prefab using the Cog asset, create a script for the projectile and updated the Ruby Script (Which included a launch function and Instantiate) We also set the key to launch to C. After this we had some error lines to fix and we had to add layers for Characters and Projectiles so that the cogs would not interact with Ruby. To make this work I had to go to Edit>ProjectSettings>Physics2D.LayerCollisionMatrix and un-tick CharacterxProjectile.
We then added to the projectile script to make the cog fix the robot and so that the cog would 'despawn' if it got too far from the center of the world. We could also add an animation to make the robot do a dance when it is fixed. Using the 'Fixed' Trigger and calling it in the bot script.
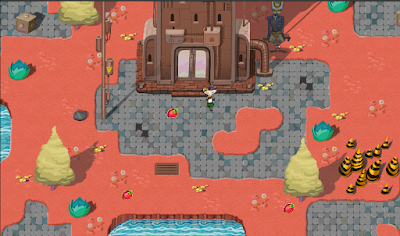
After this both Ruby and the Bots were animated and Ruby could throw cogs to fix the bot and the bot would do a dance.


Comments
Post a Comment